6A. Icon Pools
Overview
This section covers the DWC's Icon Pools, which simplifies the task of adding Scalable Vector Graphics (SVG) icons to any control that accepts HTML.Concepts Covered in This Section
- Scalable vector graphics
- The DWC's three icon pools
- Adding icons to buttons
- Custom icon pools
Scalable Vector Graphics
The SVG format is an XML-based markup language that describes two-dimensional vector graphics. One of their best features is that the SML file describes HOW to draw the icon, not WHAT to draw. In other words, they contain instructions that tell the browser how to create the icon so the resultant image can be rendered at any size without loss of quality or turning fuzzy/blurry. Therefore, we can add icons to BBjControls and make them any size that we want. We can even size them using CSS custom properties or base their size on a known value, such as the size of the control's text. And as seen in the previous BBjTree demo, we can even define fill colors for the icons so that their colors are variable as well. Additionally, the elements and attributes that make up the SVG can also be animated if desired. For these and other reasons, it's a great format to use when adding icons to controls due to its flexibility. For a first-hand example of how well an SVG image can scale, here's an SVG image of a phillips-head screw head (The DWC's three icon pools
While it's possible to add the SVG source for an icon to a BBj control's title, it's much easier to access the SVG icons from a pre-existing library. One of the main benefits of using an icon library is that they usually have hundreds or thousands of icons that share a common design style and language. That means that you can use several icons from the same library in an app they will match one another's style and provide a consistent look across the application. The DWC supports three such icon libraries by default: Tabler, Feather, and the free version of the Font Awesome icons. Both Tabler and Feather are free-to-use, open-source icon libraries that continue to improve and add new icons. Font Awesome is a bit different, as it does offer a free set of icons but the full Pro Icon set is not free to use. For example, as of version 6.1.1, the Pro set contains 16,083 icons with 2,009 free icons. Technically, there's a fourth icon set named "bbj" which is a small subset of the Tabler icons.In order to use an icon from the pool, we'll need to provide the content in HTML format. Fortunately, many of the BBj controls support rendering HTML in controls, so that's not too much of a limitation. Recall that the DWC2.bbj program from the first chapter included an icon on the [Say Hello] button, with options from each of the icon pools:
The first used the "speakerphone" icon from Tabler, the second used the "speaker" from Feather, and the last used the "fas-microphone-alt" from Font Awesome. The first two are fairly straightforward, but Font Awesome uses its own naming convention based on the style: solid, regular, light, thin, duotone, and brands (referring to company logos).
Example 1 - Adding a download icon to a button
1) To add a "download" icon to a button, we will first want to find a suitable icon. We can start by searching the existing icon pools for an appropriate icon:- Searching the Feather library for a download icon (link) reveals one named "download"
- Searching the Tabler library (link) reveals one named "download"
- Searching the Font Awesome library (link) reveals one named "download"
2) We can then add the buttons to the window using the icon pool syntax:
    rem Define the HTML title for the buttons that incorporate the download icons
        btnIconFeather$ = "<html><dwc-icon pool='feather' name='download'></dwc-icon>"
        btnIconTabler$ = "<html><dwc-icon pool='tabler' name='download'></dwc-icon>"
        btnIconFontAwesome$ = "<html><dwc-icon pool='fa' name='fas-download'></dwc-icon>"
    rem Now create the buttons using the HTML for the title
        btnFeather! = wnd!.addButton(btnIconFeather$ + "Feather's Download Icon")
        btnTabler! = wnd!.addButton(btnIconTabler$ + "Tabler's Download Icon")
        btnFontAwesome! =  wnd!.addButton(btnIconFontAwesome$ + "Font Awesome's Download Icon")
3) So far, so good. But what if we wanted to affect the size and color of the icons? We could add more buttons with icon pool syntax that set the icon's size and color using attributes (expanse, theme), or with an inline style:
    rem Define the HTML title for the alternate buttons that incorporate the cloud download icons with extra styling for size/color
        btnIconFeather$ = "<html><dwc-icon pool='feather' name='download-cloud' expanse='l' theme='danger'></dwc-icon>"
        btnIconTabler$ = "<html><dwc-icon pool='tabler' name='cloud-download' style='width: 0.5em; color: green'></dwc-icon>"
        btnIconFontAwesome$ = "<html><dwc-icon pool='fa' name='fas-cloud-download-alt' style='width: 1em; color: var(--dwc-color-danger)'></dwc-icon>"
That results in the following buttons:
    rem Now create the buttons using the HTML for the title
        btnFeather! = wnd!.addButton(btnIconFeather$ + "Feather's Cloud Download Icon")
        btnTabler! = wnd!.addButton(btnIconTabler$ + "Tabler's Cloud Download Icon")
        btnFontAwesome! =  wnd!.addButton(btnIconFontAwesome$ + "Font Awesome's Cloud Download Icon")
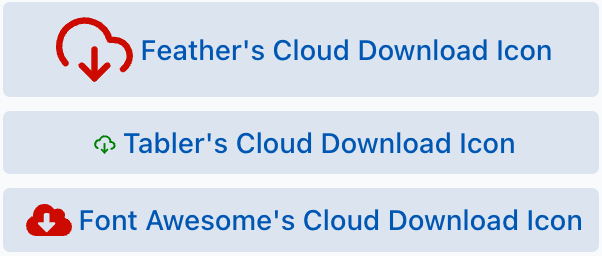
Notice that we could set the icon's color either via setting the theme attribute to danger, or by adding an inline style that set the color to a named color (green) or a CSS custom property ( var(--dwc-color-danger) ).
To see the final program, load and run the DWCTraining/06_IconPools/DownloadButton.bbj program.
Custom Icon Pools
The icon pools are nice, but what if we have our own preferred set of icons that we want to use instead? And what if they’re not in SVG format? In that case, we can define our own custom icon pool and configure it to use our image files - regardless of whether they’re in SVG, PNG, or JPG format. When we create our custom pool, we define how the DWC finds the icon files. So we can configure it to load the icons from a CDN or even a local Jetty directory.Example 2 - Adding icons from a custom icon pool that's hosted by a CDN
1) In this example, we want to reference a different icon library that's hosted by a CDN. To start, we'll want to pick an open source icon library, so we've chosen the Ionic IonIcons library.2) Next, we need to find a CDN that hosts the library, and cdnjs hosts the ionicons library at multiple versions, including the latest 6.0.2 here.
3) Next, we have to find a way to access the SVG icons by name, so we link above shows that the SVG files all have the same prefix of "https://cdnjs.cloudflare.com/ajax/libs/ionicons/7.4.0/svg/${name}.svg", followed by the icon name. So we'll use that information in our BBj program to build our custom icon pool:
rem Add a custom icon pool referencing the ionicons library from a CDNUltimately, we're injecting some JavaScript that adds another icon pool to the DWC's collection. We've given the custom icon pool the name of "ionicons" and we used the prefixing URL information to give the DWC a hint as to how to resolve the icons by name. Note that the resolverPathCdn! variable specifies the full CDN path to each icon, where the "{name}" portion will be dynamically replaced with the desired icon's name by the DWC. We've chosen to include the ".svg" suffix in the resolverPathCdn! variable to slightly decrease the amount of code needed when specifying an icon, but that wasn't strictly necessary.
rem @see https://ionic.io/ionicons for the icons
iconLibraryName! = "ionicons"
resolverPathCdn! = "https://cdnjs.cloudflare.com/ajax/libs/ionicons/7.4.0/svg/${name}.svg"
myIconPool! = "(window.Dwc ??= {}).IconsPools ??= []; window.Dwc.IconsPools.push({ name: '" + iconLibraryName! + "', resolver: name => `" + resolverPathCdn! + "` });"
web! = BBjAPI().getWebManager()
web!.injectScript(myIconPool!)
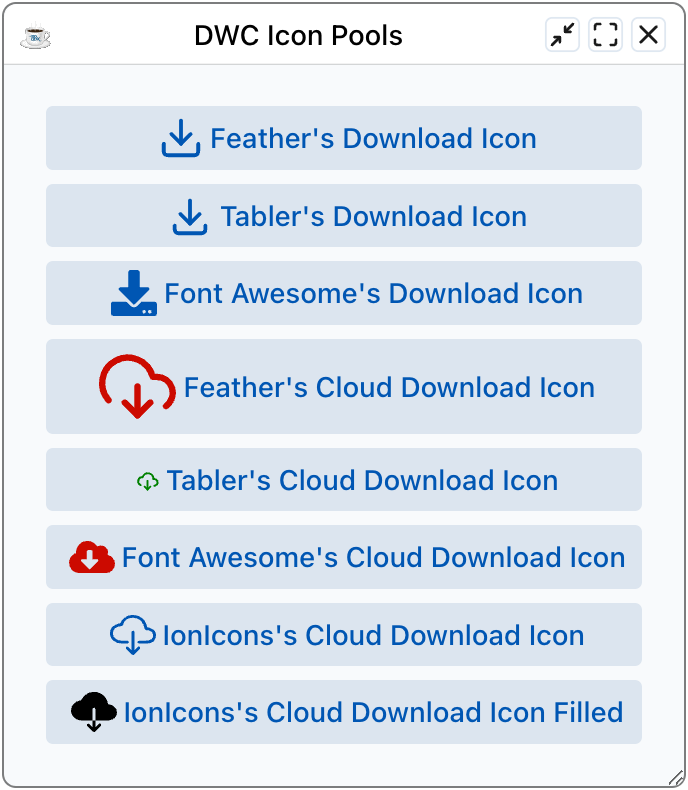
4) Lastly, we create the buttons referencing our custom icon pool name and the desired icons from the ionicons library:
    rem Define the HTML title for the buttons that incorporate the bootstrap icons
        btnIconIon1$ = "<html><dwc-icon pool='ionicons' name='cloud-download-outline'></dwc-icon>"
        btnIconIon2$ = "<html><dwc-icon pool='ionicons' name='cloud-download'></dwc-icon>"
Running our program results in the two buttons with custom icons from a CDN:
    rem Now create the buttons using the HTML for the title
        btnIonIcon1! = wnd!.addButton(btnIconIon1$ + "IonIcons's Cloud Download Icon")
        btnIonIcon2! = wnd!.addButton(btnIconIon2$ + "IonIcons's Cloud Download Icon Filled")

If we had previously downloaded an icon library, or simply had a collection of images already copied to a directory under our <BBjHome>/htdocs directory, we could have changed the resolverPathCdn! variable in the code above to point to the local Jetty directory. For example, if we had previously downloaded the free version of the Font Awesome 6.1.1 library and extracted the zip file into a directory under Jetty, we could set the resolverPathCdn! variable to a value of something like "/files/icons/fontawesome-free-6.1.1/${name}.svg". And if the downloaded library provided image files in a different format, such as PNG, then we'd simply make that change in the resolverPathCdn! variable so that the DWC will look for PNG files whenever we specify an icon for a control.
To see the final program with the custom icon pool, load and run the DWCTraining/06_IconPools/DownloadButton.bbj program. Here's an example of what it looks like showing all the buttons with different icons:
Last modified: Monday, 8 July 2024, 6:12 PM