1C. Taking an App From GUI to BUI to DWC
Overview
This section deals with a traditional BBj GUI program that contains fields and a button and uses callbacks with the process_events model. After running the program in GUI, we'll run the program in BUI and the DWC. Next, we'll inspect the DWC app in the browser's Developer Tools and modify the appearance of a BBjButton by setting CSS styles and attributes on it. We will also take advantage of the DWC's Icon Pools and add an icon to the button. We'll then take a preliminary look at using CSS Grid for client-side layout, a topic that will be covered more in-depth later in the course. We'll wrap up by looking at handling errors in the browser's console.
We'll be using this zipped folder's contents for this section.
Concepts Covered in This Section
- Running a complete graphical BBj app in the thin client (GUI), the Browser User Interface (BUI), and the Dynamic Web Client (DWC)
- Changing the window to use flow layout, ignoring the x, y, width, and height parameters, and then applying a CSS Grid layout strategy
- Setting attributes on a BBjButton to affect its size and appearance
- Making our app look and act like a real web app instead of a desktop app running in the browser
- Handling runtime errors in the browser's Developer Tools console
Sample Code
For this section, you will start by running the GUISample.bbj program in GUI (shown below), then in BUI, then in the DWC. You will then make modifications to the code to convert it to a DWC program that uses CSS Grid for layout. You may either make your changes directly in the provided sample or copy the contents of the sample to a new program and use that to progress through the exercises. The training files also include programs named DWC1.bbj and DWC2.bbj that are the result of modifying the original GUISample.bbj program according to the exercises below.
Program Notes
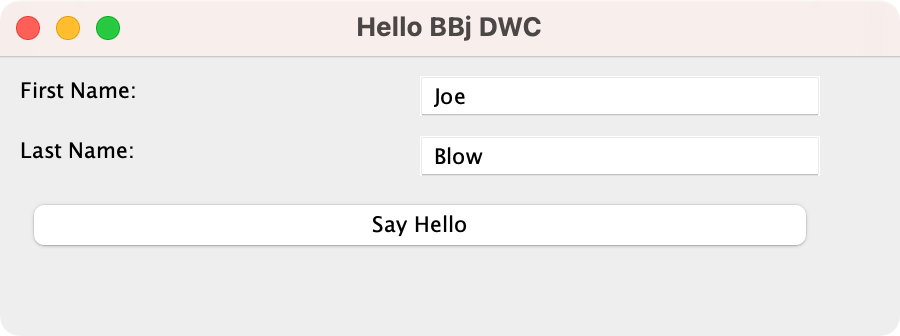
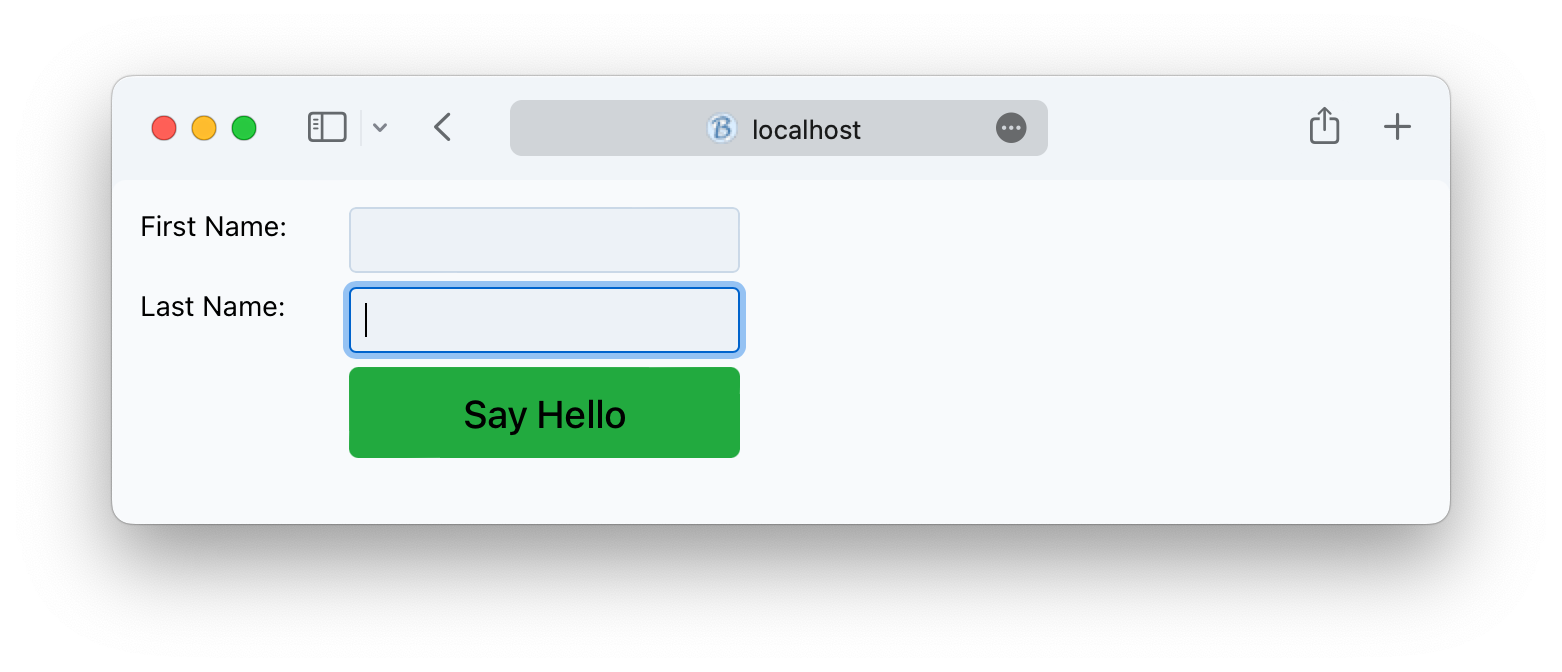
The program displays a dialog with inputs for the user's first and last names and a [Say Hello] button that greets the user by name when pressed. The GUISample.bbj program can run equally well in all three clients, but the exercises change the code to convert it to a DWC program that uses CSS Grid for layout.
The DWC1.bbj program sets the $00100000$ creation flag on the window to cause the DWC to ignore all size and position information for the controls added to the window. It then adds styles to the window's panel to layout the controls using CSS Grid. It also sets attributes on the [Say Hello] button so that it is displayed as a very large green button.
The DWC2.bbj program sets more window creation flags to hide the window's title bar and to set it to be initially maximized. It then removes all the x, y, width, and height parameters from the controls added to the window since it's using CSS for layout.
Example 1 - Running the App in GUI, BUI, and the DWC
1) Begin by loading the GUISample.bbj program and running it in GUI, BUI, and the DWC. In at least one of the clients, fill in your first and last names in the BBjEditBoxes, then press the [Say Hello] button. The program will display a message box with a customized greeting using your full name.
Example 2 - Responsive Layouts
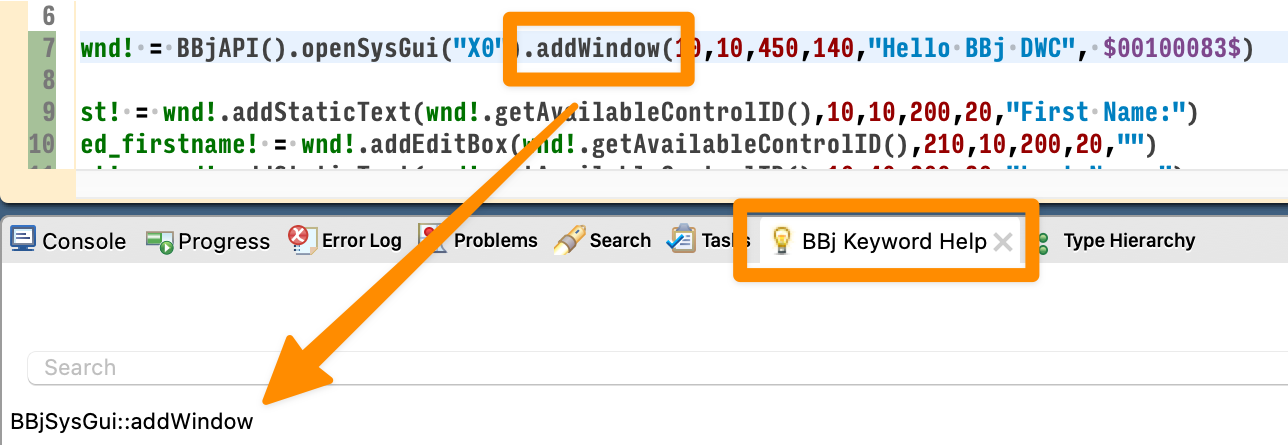
1) BBj programs running in GUI, BUI, and the DWC create their windows and controls by calling the appropriate add method on the BBjSysGui or BBjWindow objects. These add methods, such as the BBjSysGui::addWindow method shown below, take the window's or control's desired x, y, width, and height as parameters.

One of the major goals for the DWC was to provide the ability to use CSS for client-side layout. In addition to giving developers the ability to write responsive and dynamic apps that work well on a variety of devices and screen sizes, the layout occurs on the client and does not require any round trips to the server. That's because the layout is accomplished by providing a set of rules or guidelines via CSS that was sent to the client's browser during the app's initialization.
To enable flow layout on a window, all that needs to be done is to set the $00100000$ creation flag which tells the DWC to ignore all x, y, width, and height settings for the controls contained by the window. For example, changing the code to specify that flag when creating the window causes the program to use a flow layout instead of absolute positions, resulting in a window like this:

Begin by changing the code to specify the $00100083$ flags immediately following the window's title string in the line of code that instantiates the BBjTopLevelWindow. If you have installed the BBjUtils plug-in and have set the BBj Keyword Help view to be visible (Eclipse Preferences, Window > Show View > Other > BBj Keyword Help), you can click on the 'addWindow' method name as shown below and the plug-in will display the BBj Help link for the BBjSysGui::addWindow method. Double-clicking on the entry will display the associate help page in your browser so that you can decipher the flag values.
After making that change to the flags in your program, run it in the DWC to see how that affected the layout. All the controls in the window should now flow from left to right without any spacing between them, and the window is sized just large enough to contain all the controls.
2) Now that the window uses a flow layout, the next step is to provide some rudimentary CSS styling to the window panel (the immediate parent element for the controls in the window). In this example, we will be using CSS Grid to set the desired layout. This can be done in two different ways, but we'll use the first method specified in 2-1 for this exercise:
2-1) Inside the BBj Code (used in this exercise): Add the styles by executing the BBjControl::setStyle method on the window's panel, providing the desired CSS styles, as in:
REM setting the styles into the style property of the element2-2) In an external CSS file: Add the styles to the window by adding a class name to the element. That same class name is then added to an external CSS file that associates the desired CSS styles above with the class name. You can find an example of this method in the 01_GUI2BUI2DWC/DWC_ExternalCSS folder that contains the Sample.bbj and Sample.css files. For example:
wnd!.setPanelStyle("display","inline-grid")
wnd!.setPanelStyle("grid-template-columns","1fr 1fr")
wnd!.setPanelStyle("gap","5px")
BBj Code:
wnd!.addPanelStyle("mypanel")
External CSS File:
.mypanel{
    display:inline-grid;
    grid-template-columns:1fr 1fr;
    gap:5px;
}
Both ways are valid, but in a production system, you would want definitely to use the second way as the client's browser has all the CSS it needs to determine the layout as soon as the app is loaded. In contrast, the first method requires that the interpreter on the server executes the three lines of setPanelStyle() code sequentially, with the CSS applied to the window panel in three separate steps. This will be slower as the server sends the layout information to the client in multiple steps.For this exercise, it's easiest to add the lines of code directly to the BBj program as we have everything we need all contained in a single file, and since we're currently developing the app we're not overly concerned with speed until we're ready to deploy it. We cover the CSS Grid layout in much greater detail on the second day of the class, but for now, here's a brief explanation:
wnd!.setPanelStyle("display","grid") - Sets the window to use CSS Grid for the layout, instead of simply flowing the controls as it did in the screenshot in step 1.
wnd!.setPanelStyle("grid-template-columns","180px auto") - Sets the window's CSS Grid to place the controls in two vertical columns, with the first being 180 pixels wide and the second set to take up the remaining space given the window's width. This works well for our program, as the BBjStaticText controls that act as labels will be placed in the first column, and the BBjEditBox for the user's input will be placed in the second column. After adding the first row of controls, the CSS Grid will 'wrap' and begin placing the next controls in another row.
wnd!.setPanelStyle("gap","5px") - Sets a 5-pixel gap between the CSS Grid's rows and columns, so that the controls will have some space between them instead of being crowded together. Note that it's possible to use a variety of different CSS units, such as '0.25in' for one-quarter of an inch, or a CSS custom property such as 'var(--bbj-space)'. The value of 5 pixels works well for this example, but if we were concerned about being as compatible as possible with themes, we would use the DWC's --bbj-space custom property as it's based on the font size and scales well as that changes.
wnd!.setPanelStyle("padding","15px") - Sets a 15-pixel padding on the window so that the controls have 15px of space on the window's top, right, bottom, and left edges. If we wanted to use the DWC's CSS custom properties here, we could specify an extra-large space like 'var(--bbj-space-xl)'. If we really wanted to flex our CSS muscles, would provide a value like 'calc(var(--bbj-space) * 2)', which multiples the value of the --bbj-space amount by a factor of two.
After making these changes, your app should look similar to the following: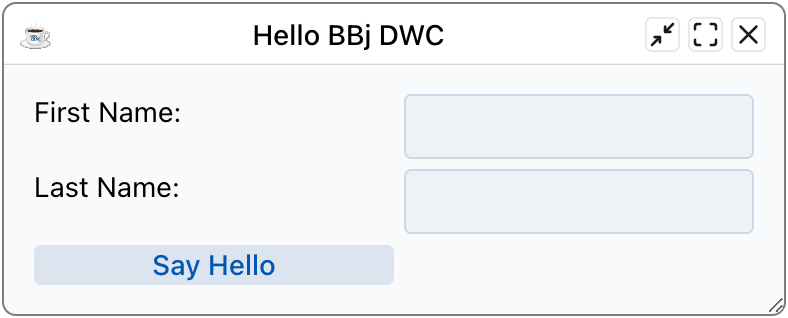
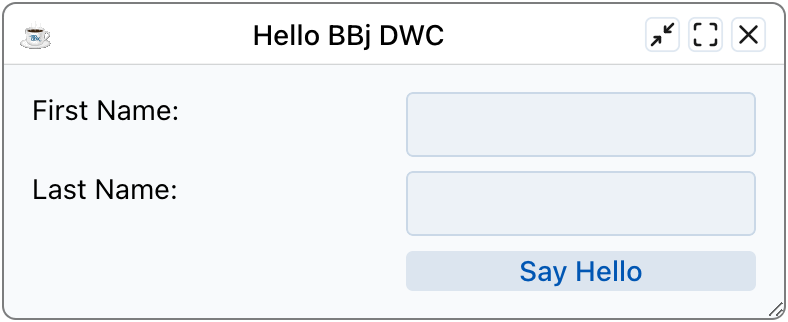
3) Our form is looking pretty good, except that the [Say Hello] button would look better if it spanned both columns or was located on the right column instead of the left. To make the button span both columns, either of these two methods work:
btn!.setStyle("grid-column","1 / 3") - Sets the button to be placed in column 1 (grid-column-start) and end (grid-column-end) in column 2 (IOW, before column 3)
btn!.setStyle("grid-column","span 2") - Sets the button to span two grid columns. Since it's placed in column 1 by default, the 'span 2' value is all that's needed to cause it to take up both columns in the grid.
This is what the button looks like spanning both columns: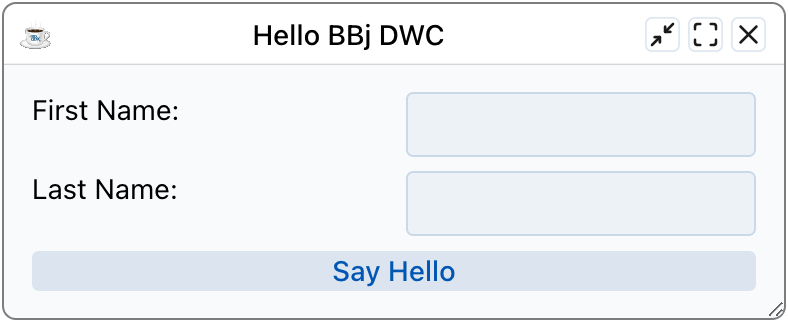
To place the button in the second column, use this line of code:
btn!.setStyle("grid-column","2") - Sets the button to be placed in column two, as shown below:
4) You may be wondering why the previous examples used the setPanelStyle() method instead of the setStyle() method. That's because BBjTopLevelWindows and traditional BBjChildWindows are created from three nested DIVs as shown below:
<div id="4" class="BBjDockedChildrenPanel BBjControl BBjTopLevelWindow-container">
<div id="2" class="BBjWindow BBjControl bbj-0-0 BBjTopLevelWindow-center">All the controls contained in the window, e.g. the edit boxes and the [Say Hello] button, are child elements of the innermost window element with the "BBjPanel BBjTopLevelWindow-content" class in the HTML code above. Because the controls are children of the "BBjPanel" class element, when we call the setPanelStyle() method and provide the "display" property with the "grid" value we're instructing the browser to use the CSS Grid to position the controls in the window. If called the setStyle() method instead, we would be instructing the browser to use the CSS Grid to position the window's inner "BBjPanel" element and the controls would use the simple flow layout shown in step 1.
<div id="3" class="BBjPanel BBjTopLevelWindow-content" tabindex="0">
< -- Various BBj Controls Contained by the Window -- >
</div>
</div>
</div>
The following diagram illustrates the BBjTopLevelWindow's structure and includes every possible capability such as its ability to support docked child windows and a status bar. In order to successfully accommodate all these features, BBj defines the window in HTML using the three nested DIVs shown above.

However, it's likely that several of your top-level/child windows won't ever need docked windows or a status bar. For cases like that, the DWC offers the ability to create the window using a simplified structure with just one DIV. As mentioned in the TechCon 2022 DWC session, the BBjWindow::addChildWindow method now supports flags to create two types of simple child windows that are built from a single HTML DIV instead of the three nested DIVs shown above. In addition to simplifying the underlying HTML and reducing the number of elements in the DOM, it also simplifies our BBj code. When our child windows are built from a single DIV, we no longer have to distinguish between the various ways of setting styles based on the window's underlying HTML elements. Therefore, our code can confidently call setStyle() instead of trying to figure out if we should use setOuterStyle(), setDockStyle(), setStyle(), or setPanelStyle().
Example 3 - BBjControl Attributes
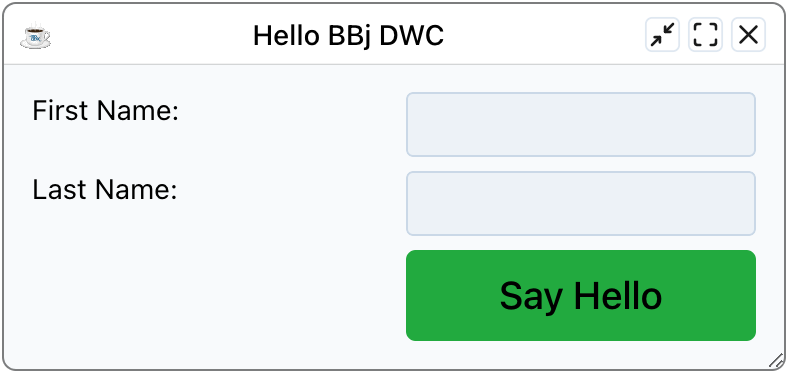
1) The DWC-specific documentation for the BBjButton displays a Properties table with attributes that we can use with the BBj setAttribute() method. The two attributes of interest for this exercise are 'expanse' and 'theme'. The expanse affects the control's size and takes values like 'l' for a 'large' size. Begin by setting the button's 'expanse' attribute to 'xl' so that the button is extra large. Note that setting the button's 'expanse' attribute ultimately makes several changes including, increasing the font size, height, and padding around the button's text.
2) Similar to step 1, this time set the button's 'theme' attribute to the 'success' component theme. The success theme's hue is defined as a green color, so this should change the button to be green. After making both changes, the form should now look similar to:
3) At this point we are caught up to the DWC1.bbj program in the class materials. If you had any problems up to this point, you can compare your program to the code in DWC1.bbj.
4) If you'd like to experiment, try changing the 'them' attribute to 'danger' or 'info'.
Example 4 - Making a Real Web App
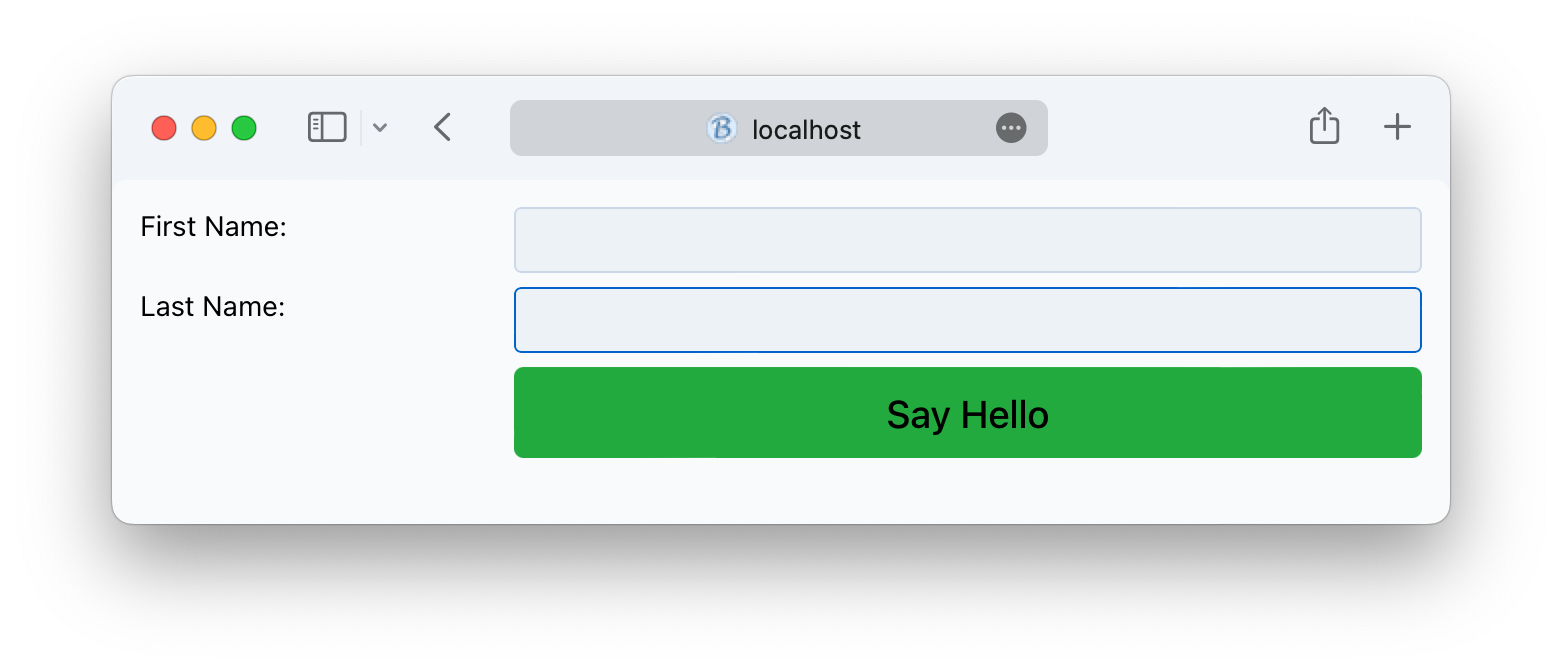
1) Our GUI to BUI to DWC app is progressing nicely, but there's still one big difference between our program and a typical web app: The app's dialog-style window with the button controls that let the user minimize, maximize, restore, and close the app. These are hallmarks of desktop apps, but it's rare to find web pages and web applications that display windowed content in this manner. So our next steps convert our windowed app to appear indistinguishable from a typical web app. We can accomplish this by simply modifying the window's creation flags, changing them from $00100083$ to $01101083$. That set of flags instructs BBj to create the window without a title bar and initially maximized. With this single change, our app now looks and acts like a typical web page/app that takes up the full page in the client's browser and even works pretty well on mobile devices. However, the controls in column two end up being too wide when the window is resized:
2) There are a few different ways to solve this problem, such as changing the 'auto' width to another value in pixels. However, we're going to solve the problem in a different way making everything dynamic:
wnd!.setPanelStyle("display","inline-grid") - Sets the CSS Grid to display as an inline grid. Inline elements do not generate line breaks before or after themselves. In normal flow, the next element will be on the same line if there is space. In our case, this prevents the grid from taking up the full width of the window.
wnd!.setPanelStyle("grid-template-columns","1fr 2fr") - Sets the left column to take up one flex unit (fr) and the right column to take up two flex units. The 'fr' unit represents a fraction of the leftover space in the grid container, and by providing these values we've essentially said that the right-hand column with the input controls should take up twice as much space width-wise as the labels in the first column. After these changes, our web page now looks like this:
3) Although it's not necessary, we make our code more legible by removing the x, y, width, and height parameters if we're really only ever going to run our app in the Dynamic Web Client. If we still planned on running our app in GUI or BUI, we could stop here and be finished. However, since we're planning on running this app in the DWC to take advantage of responsive layouts, we can eliminate the control ID and the size and position information when adding the controls, as in:
st! = wnd!.addStaticText("First Name:")After making these changes, your program should match the DWC2.bbj program from the course materials.
ed_firstname! = wnd!.addEditBox("")
st! = wnd!.addStaticText("Last Name:")
ed_lastname! = wnd!.addEditBox("")
btn! = wnd!.addButton("Say Hello")
Going the Extra Mile
1) If you want to experiment and run your app on your smartphone, you may want to try making a few changes to improve things. To make things easier for us, start by adding code at the top of the program to forcefully run the app in the DWC if it was launched in BUI (such as from the Eclipse [Run BUI Program] tool button (
rem If the app is running in BUI, switch it automatically to run in the DWC client instead
rem ================================================================================
if (info(3, 6) = "5") then
    bui! = BBjAPI().getBuiManager()
    url! = bui!.getUrl().replaceAll("apps", "webapp")
    action! = bui!.urlAction(url!)
    bui!.setEndAction(action!)
    release
endif
2) When running on a mobile device like an iPhone, you find that the phone zooms into the form when you put focus on one of the BBjEditBoxes for the first and last name. That's because iOS treats 16px as the default font size, but the DWC's CSS property that deals with font size (font-size) is set to var(--bbj-font-size). Obviously, that means that CSS custom properties can be set to other CSS custom properties, and that's exactly the case here. The --dwc-font-size custom property is set to 0.875rem by default, and (16px * 0.875) equals 14px. So by default our DWC apps will use a base font size of 14px, and since that's smaller than the iOS preferred default of 16px it will zoom into the form when we put focus on an input control. There are at least two ways to deal with this:
2-1) Change the DWC's default font size to 16px:
wnd!.setStyle("font-size","16px")
We'll cover the syntax in more detail later in the course, but this changes the value of the font-size CSS property from var(--bbj-font-size) to 16 pixels. Since the controls all have a font size of 16 pixels, iOS no longer zooms in when we focus on the input controls.
2-2) Set a meta tag in the document header that prevents the user from scaling, or zooming, the viewport:
web! = BBjAPI().getWebManager()
web!.setMeta("viewport","width=device-width,initial-scale=1,user-scalable=no,minimal-ui")
Example 5 - Error Handling
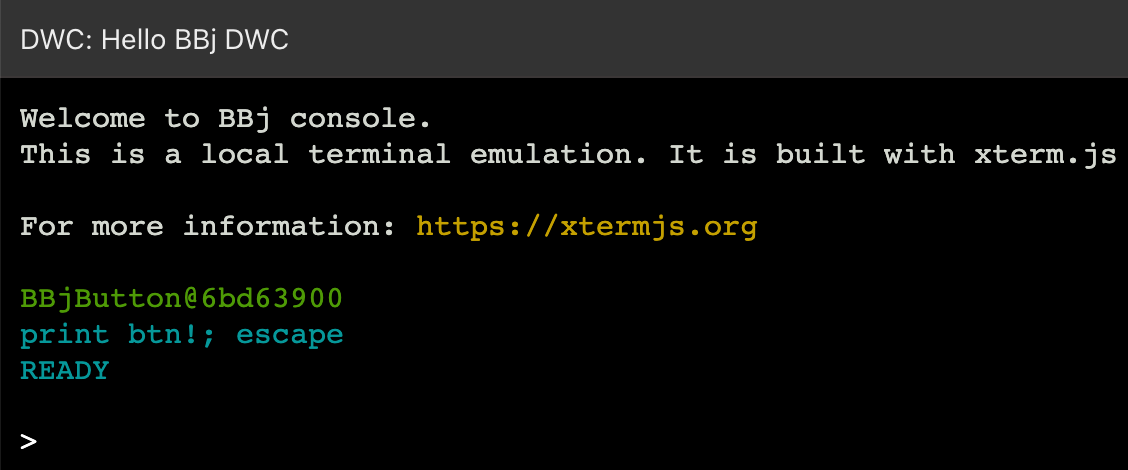
1) Our DWC app is running correctly, but what happens when we make a mistake in our code? We have two possible ways to deal with runtime errors: the mini console and the browser's Developer Tools Console. To test these out, add code similar to the following just before the process_events line:
print btn!; escape
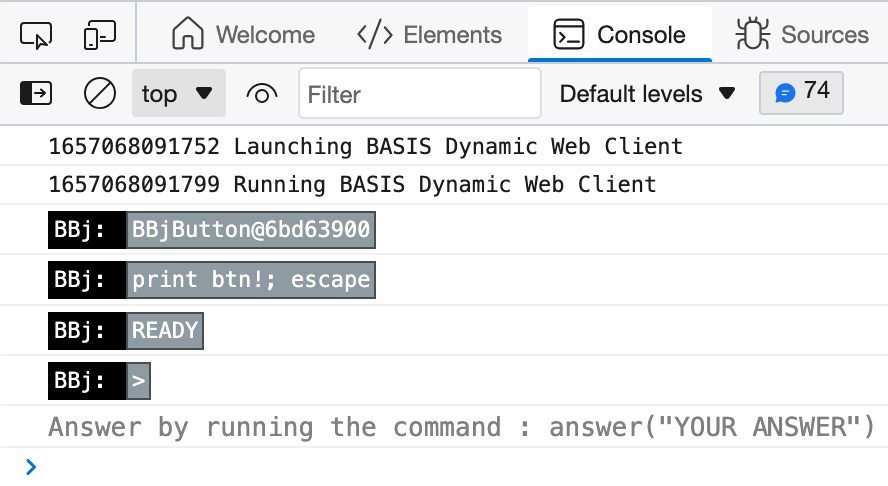
And run the program again in the DWC. Notice that the button information is displayed both in the BBj console and the Developer Tools' Console tab:
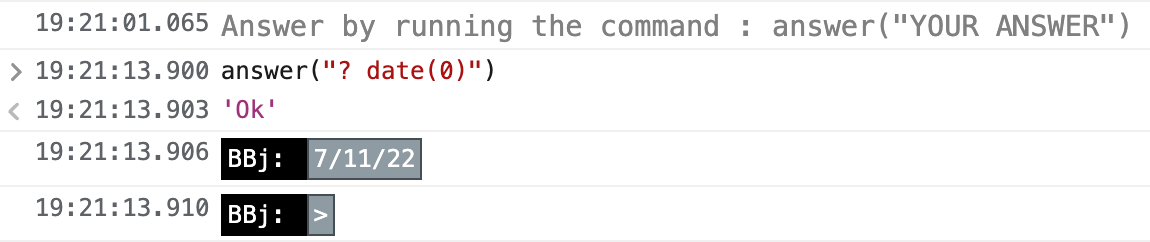
2) Try interacting with the BBj console by printing out the date (hint: ? date(0)).
3) Now print out the date in the Console using the provided Answer syntax: